Scan a page on a typical home scanner or an office multifunction printer and you'll often get a document surrounded by a wide, empty white border — sometimes an inch or more of nothing on every side, just because the scanner glass is bigger than the paper. It's harmless in a document you're only reading yourself, but it looks unpolished in anything shared, prints wastefully, and forces extra pinch-zooming on a phone screen.
Cropping fixes that by trimming the page boundary down to fit the content more closely. It's a genuinely quick fix — but the way it's actually implemented, here and on most tools like it, works a little differently from what people expect the first time they try it. This guide covers exactly how that works, so the one adjustable number you're given does what you want on the first attempt.
What Cropping a PDF Actually Does
A crop tool trims an even margin off every side of every page, shrinking the visible page boundary without touching anything inside it. My PDF's Crop PDF tool works by percentage: you choose how much of each page's width and height to remove — say, 8% — and that percentage is trimmed from the top, bottom, left and right of every single page in the document.
The text and images that were already inside the new, smaller boundary aren't altered, resized, or re-rendered in any way — they simply become the content of a tighter page. Because the trim is calculated as a percentage of each page's own dimensions rather than a fixed measurement, it scales sensibly whether the source document is A4, US Letter, or a mix of both, and the same percentage applies consistently across every page regardless of its original size.
Why People Crop PDFs
A handful of situations come up constantly:
- Wide scanner borders. The most common reason by far — a scanned page surrounded by far more white space than the original paper actually had.
- Excess padding from an export. Slides or documents exported to PDF from presentation software sometimes carry more margin than intended, leaving content looking small and centered in a sea of white.
- Preparing a document for comfortable phone reading. A tighter page means less pinch-zooming to actually read the text on a small screen.
- Tidying up a batch of scans before filing or merging. A stack of documents scanned at different times, on different machines, rarely has matching margins — cropping them to a consistent trim gives the whole batch a uniform look.
How Percentage-Based Cropping Actually Works
This is the part that catches people off guard the first time, so it's worth walking through carefully. A lot of people expect to drag a selection box around exactly the area they want to keep, the way you'd crop a photo. That's not how this tool works — instead, you enter one number, and that percentage is removed evenly from all four sides of every page in the document.
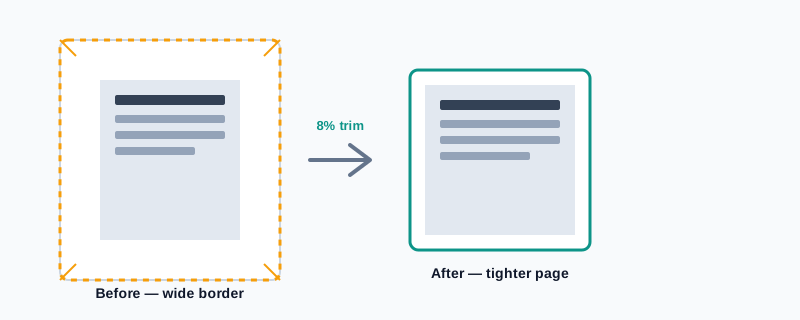
So if you set the trim to 8%, and your page is, say, 1000 pixels wide, roughly 80 pixels come off the left edge and another 80 off the right — not 160 off just one side, and not a custom shape cut out of the middle. The same math applies to the top and bottom, using the page's height. It's a simple, predictable rule, but it does mean the tool can't currently target one side more than another, or single out one specific page for a different trim than the rest.
How to Crop a PDF, Step by Step
Step 1: Open the Crop PDF Tool
Go to My PDF's Crop PDF tool. No installation or account needed.
Step 2: Upload Your PDF
Drag your file into the upload area, or click to browse and select it.
Step 3: Choose a Trim Percentage
Set how much to remove from each side — anywhere from 1% up to 40%. If you're not sure how much border your pages actually have, start small.
Step 4: Click "Crop PDF"
Every page is trimmed in one pass, typically within seconds.
Step 5: Download and Preview Before Printing in Bulk
Open the result and check a page or two before sending a large batch to a printer — a percentage that looked reasonable in theory can occasionally clip more than intended on a page with unusually little margin to begin with.
A Practical Example: Cleaning Up a Scanned Handout
Say you've scanned a ten-page handout on an office scanner that left a noticeably wide white border around every page — enough that the content looks small and off-center.
- Upload the scanned file to Crop PDF.
- Start with a modest trim — 6% is a reasonable first guess for a typical scanner border.
- Download the result and open the first page to check: does the border look tighter without anything important getting cut off near the edges?
- If there's clearly still room to trim further, re-run the crop on the original file at a slightly higher percentage — say 10% — rather than cropping the already-cropped file again, which would compound two separate trims unpredictably.
- Once it looks right, that's your final file — ready to file, merge with other documents, or print.
Treating it as "try a modest number, check, adjust from the original if needed" is a lot more reliable than guessing a large percentage on the first attempt and hoping for the best.
What About Asymmetric Margins or Cropping Just One Page?
Worth being upfront about this, since it's a real limitation rather than something to gloss over: this tool applies one trim percentage evenly across all four sides of every page. It doesn't currently support cropping more off one side than another, or applying a different trim to a single page while leaving the rest of the document untouched.
For the overwhelming majority of cases — a scanned document with a fairly even border — that's not a problem, since the border itself is usually close to even on all sides to begin with. But if you have a document where, say, only the left margin is oversized (common with pages that were originally three-hole-punched), or where one specific page genuinely needs a different trim than the rest, here's the workaround:
- Use Extract Pages to pull out just the page or pages that need different treatment.
- Crop that smaller file on its own, at whatever percentage suits its specific margins.
- Crop the remaining pages separately at their own appropriate percentage.
- Merge both cropped pieces back into one final document, in the correct order.
It's a few extra steps, but it gets you a properly, individually cropped result without needing a different tool.
Common Mistakes When Cropping a PDF
Choosing too large a percentage on the first try. A big trim can clip real content if the actual margin was smaller than assumed. Start modest and increase gradually rather than guessing high.
Not previewing before a large print run. A crop that looks fine on screen is worth double-checking on an actual printed page before running off fifty copies.
Cropping after merging mixed-source scans instead of before. If you're combining pages scanned with noticeably different margins, crop each source to a comparable trim first, then merge — merging first and cropping once afterward applies a single percentage across pages that never had matching borders to begin with.
Forgetting a protected PDF needs unlocking first. An encrypted file can't be cropped until its password is removed with Unlock PDF.
Assuming crop can target just one side. Since the trim applies evenly to all four sides, a document needing an asymmetric crop needs the extract-crop-merge workaround above, not a single crop pass.
Crop vs. Resize vs. Other Page Tools
These get mixed up because they all sound like "make the page a different size," but they solve different problems:
| Tool | What it changes | Use it when |
|---|---|---|
| Crop PDF | Trims margins, shrinking the page boundary around existing content | A page has excess white space or a scanner border to remove |
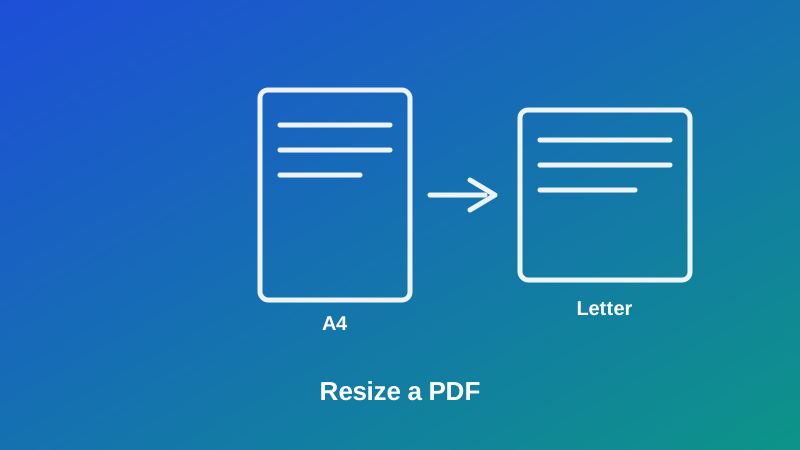
| Resize PDF | Rescales the whole page to a standard size like A4 or Letter | Pages need to match a standard paper size for printing |
| Extract Pages / Organize Pages | Changes which pages exist or what order they're in | The wrong pages are included, or they're in the wrong sequence |
A document scanned with a wide border and mismatched paper sizes commonly needs both: crop first to remove the excess margin, then resize to bring every page to the same standard dimensions.
Tips & Best Practices
- Start with a small trim percentage — 5–10% handles most scanner borders without any real risk to your content.
- Preview before committing to a large print run. A quick look at one or two pages catches an over-aggressive trim before it becomes fifty wasted printed copies.
- Crop mismatched scans before merging them, not after, so the trim is meaningful for each source page rather than averaged across pages that never matched to begin with.
- Combine cropping with resizing when a document also needs to end up at a standard paper size — crop first, resize second.
- Unlock protected files before cropping. Encryption has to come off first, using the current password.
Key Takeaways
- Cropping trims one chosen percentage evenly off all four sides of every page — it isn't a drag-to-select visual tool.
- Start with a modest trim (5–10%) for a typical scanner border, and always preview before a large print run.
- The same percentage applies to every page, so mismatched scans crop best individually, before merging, rather than all at once afterward.
- Asymmetric margins or a single differently-cropped page need a quick extract-crop-merge workaround, since a single crop pass can't target one side or one page alone.
- Crop and Resize solve different problems — trim margins first, then standardize paper size if you need both.
Related Reading
If your document also needs a standard paper size after cropping, preparing PDFs for print and web covers that next step in detail. For the full set of page-level tools — splitting, reordering and rotating alongside cropping — see the complete guide to organizing PDF pages. For more guides like this one, browse the full blog or the complete tools directory.
Got a document with margins to tighten up? Open the Crop PDF tool and trim it in seconds.

Comments
Comments aren't open on the blog yet. In the meantime, share this article using the buttons above, or reach us directly at contact@mypdf.tech.